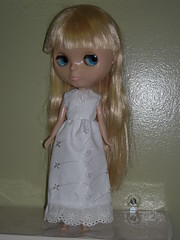
I LOVE how this dress & headband turned out.
Has an underskirt and a rubber spider on the headband.
Design by me! Want one? Contact me!
Friday, August 22, 2008

Thursday, August 21, 2008
Changing Blythe's Eyechips Tutorial
***Updated April 16, 2010
1. before

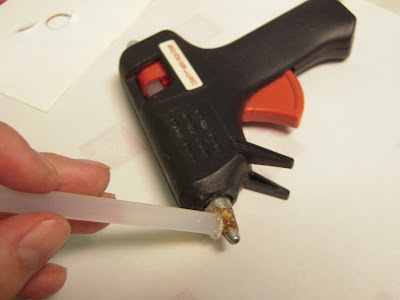
2. heat up your glue gun & melt the end of a glue stick.
3. Hold her eyelashes out of the way and stick the melted end of the gluestick in the center of the eyechip that you want removed.
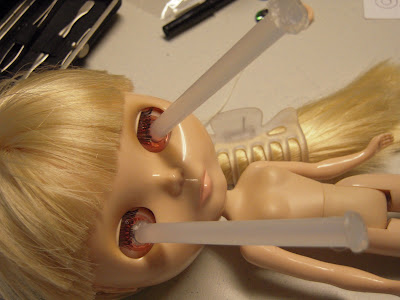
4. Wait 5+ minutes! Grip the doll and pull on the gluestick. Pull hard - don't be afraid of hurting the doll.
 5. The eyechip will pull right off the end of the gluestick, sometimes with a bit of a struggle - but it WILL pop off!
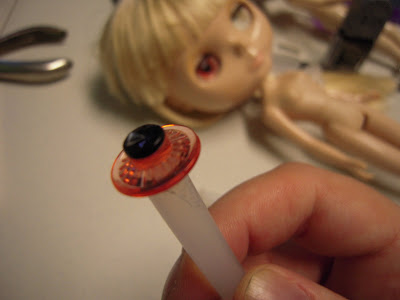
6. Do the same with the other eye.
7. Personally, I found these stickers. They are the exact size of the back of the eyechip (half and inch) & have a silver back. Punch a hole in the center of the sticker with a hole-punch (the exact size of the post on the back of the eyechip.) You can also choose not to foil the back of the eyechip. Cool-cat offers foil stickers in the exact same size of the eyechip, and they come in different colors as well.
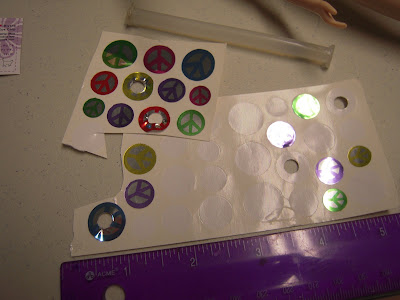
8. Stick the sticker on the back of the eyechips.
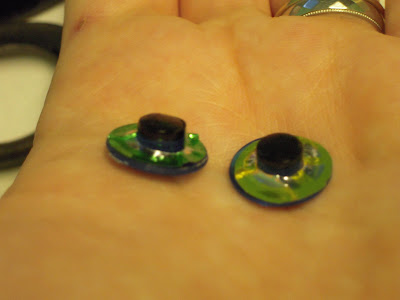
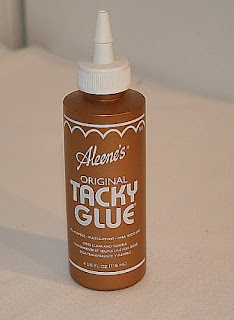
9. Use a good glue to put the eyechips back in the head. I like to use Aleene's Tacky Glue. Hot glue will NOT work; don't use super glue as I've heard it will damage the plastic over time. Put a dab right inside the eyeball hole.
10. Be careful of her eyelashes and place the eyechip in the hole. Be sure to push it right in so that the edge, all around, is in the eye. If an edge is sticking out, the eyelid will not open properly. Hold the eyechip, in the head, for a few seconds, then allow to dry completely before pulling the cord.

11. all done!

2. heat up your glue gun & melt the end of a glue stick.
3. Hold her eyelashes out of the way and stick the melted end of the gluestick in the center of the eyechip that you want removed.
4. Wait 5+ minutes! Grip the doll and pull on the gluestick. Pull hard - don't be afraid of hurting the doll.
5. The eyechip will pull right off the end of the gluestick, sometimes with a bit of a struggle - but it WILL pop off!
6. Do the same with the other eye.
7. Personally, I found these stickers. They are the exact size of the back of the eyechip (half and inch) & have a silver back. Punch a hole in the center of the sticker with a hole-punch (the exact size of the post on the back of the eyechip.) You can also choose not to foil the back of the eyechip. Cool-cat offers foil stickers in the exact same size of the eyechip, and they come in different colors as well.

8. Stick the sticker on the back of the eyechips.

9. Use a good glue to put the eyechips back in the head. I like to use Aleene's Tacky Glue. Hot glue will NOT work; don't use super glue as I've heard it will damage the plastic over time. Put a dab right inside the eyeball hole.

10. Be careful of her eyelashes and place the eyechip in the hole. Be sure to push it right in so that the edge, all around, is in the eye. If an edge is sticking out, the eyelid will not open properly. Hold the eyechip, in the head, for a few seconds, then allow to dry completely before pulling the cord.

11. all done!
Saturday, August 16, 2008


Friday, August 15, 2008
Traditional Japanese Owl Tutorial
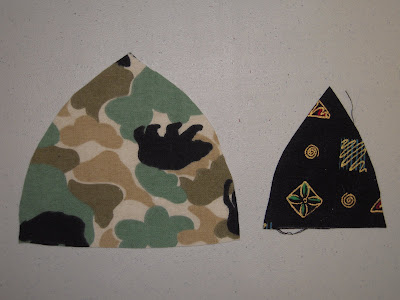
1. The pattern: Enlarge or shrink, depending on what size you want your owl.
 2. Cut out pattern, using 2 different fabrics.
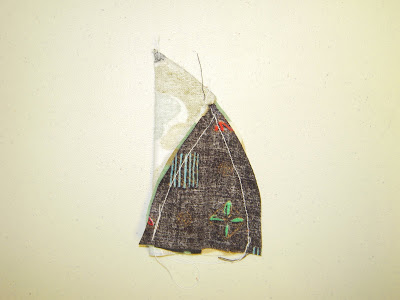
 3. Put right sides together and sew up the left side, just to the top of the smaller piece.
 4. Move the unsewn edge of the smaller fabric to the edge of the larger fabric. It helps to pin them in place. Sew up the seam, right to the tip of the larger fabric.
 5. Turn right-side out.
  6. Put a straight pin through the fabric at the top of the belly.
 7. Stuff the owl then sew embroidery floss in a loose stitch around the bottom.
 8. Pull string tight and tie in a knot., then remove straight pin.
 9. Cut out 2 colored felt circles, and 2 smaller white felt circles.
 10. Fold over the point, then sew the tip of the beak to the owls belly.
 11. Attach the two circles of colored felt with the same colored thread.
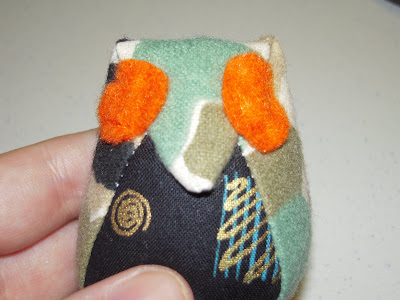 12. Pull a dark thread through the center of the colored felt, and through the center a circle of white felt (smaller than the colored).
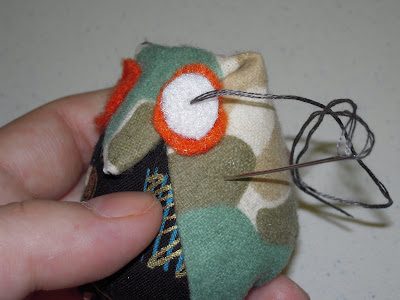 13. Poke your needle in the colored felt and through the center of the white felt.
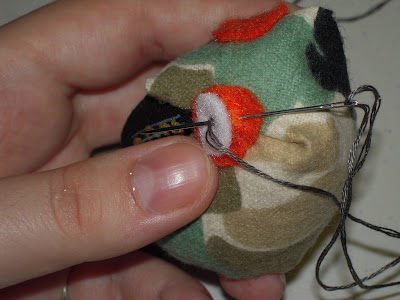 14. Pull through to make a "loop" on the white felt.
 15. Loop all the way around the white felt.
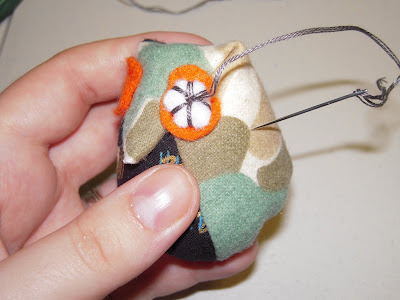 16. Add a dark bead to the center.
 17. Attach the second eye & you are finished! You could also add a triangle of yellow or orange felt to the end of it's beak, if desired.
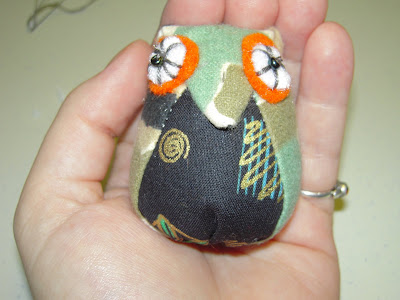
HERE is a tutorial in japanese.
 2. Cut out pattern, using 2 different fabrics.
 3. Put right sides together and sew up the left side, just to the top of the smaller piece.
 4. Move the unsewn edge of the smaller fabric to the edge of the larger fabric. It helps to pin them in place. Sew up the seam, right to the tip of the larger fabric.
 5. Turn right-side out. 6. Put a straight pin through the fabric at the top of the belly.
 7. Stuff the owl then sew embroidery floss in a loose stitch around the bottom.
 8. Pull string tight and tie in a knot., then remove straight pin.
 9. Cut out 2 colored felt circles, and 2 smaller white felt circles.
 10. Fold over the point, then sew the tip of the beak to the owls belly.
 11. Attach the two circles of colored felt with the same colored thread.
 12. Pull a dark thread through the center of the colored felt, and through the center a circle of white felt (smaller than the colored).13. Poke your needle in the colored felt and through the center of the white felt.14. Pull through to make a "loop" on the white felt.15. Loop all the way around the white felt.16. Add a dark bead to the center.
 17. Attach the second eye & you are finished! You could also add a triangle of yellow or orange felt to the end of it's beak, if desired.
HERE is a tutorial in japanese.
Saturday, August 2, 2008

Punk Blythe Dresses
All Blythe clothes available in my DaWanda store:
http://en.dawanda.com/shop/JennyTheArtist

http://en.dawanda.com/shop/JennyTheArtist

Subscribe to:
Posts (Atom)